Summary
When deploying applications on netlify, we usually add our app’s environment variables manually. And whenever there’s a need to update it, we have to go back there to netlify to do it. With Doppler, an organization/team or individuals can manage their application’s environment variables easily. In this article, we will be learning how to integrate Doppler with Netlify.
Goal
In this article, we will clone a mini e-commerce project built with Reactjs that uses firebase for authentication from Github, save the app’s environment variables in a doppler workspace and sync it with netlify. To achieve this, we will set up a doppler account, create a workspace, add a project to the workspace and sync it with netlify. At the end of this article, readers will know how to integrate Doppler with netlify.
Prerequisites
You should have a netlify account. If you don’t already, you can create one here.
What is Doppler and why should I use it?
Following the first two sections of this article, you might be wondering, “what exactly is doppler?”. In this section, we will briefly go over what doppler is and why you should use it.
Doppler is a universal secret manager. It helps Software Engineers store/manage credentials used in their applications just like the traditional .env files. With doppler, we can share secret credentials/variables across many platforms, in several programming languages. See all the possible doppler integrations here .
With Doppler, we can manage all the secret credentials/variables used in an application across different platforms in one place (a single source of truth), for example, if your company has a MERN stack app with the frontend deployed on netlify, and maybe a test version of the frontend on vercel and the backend on AWS, you can easily manage all the credentials used in all these platforms with doppler. It's that easy and fast.
Syncing Doppler with Netlify
In this section, we will learn how to sync credentials saved in doppler with an app deployed on netlify. To get started, Let’s clone the project we will be deploying on netlify from Github using the code below. To do this, you need to have git installed in your machine.
git clone https://github.com/Origho-precious/ecommerce-project.git
Next, create a repository and add the project to it. You need to do this to deploy the project on netlify via Github. After doing that, log in to your netlify account and deploy the application there.
The next thing to do is to set up a doppler workspace, create a project for the e-commerce app, and add the env variables we need in the app. let’s do that below.
Creating a Doppler Workspace.
When creating a doppler account, you will be prompted to create a workspace. You can add your team members to it and manage the access level each person should have in that workspace.
Let’s create a doppler workspace. Let’s get started by visiting the doppler official website and creating an account. After that, we will get to a screen where we need to create a workspace as seen below.
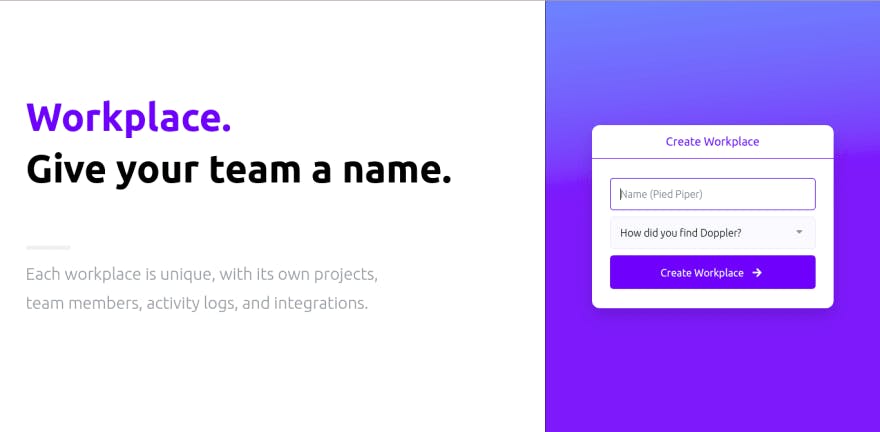
After filling and submitting the form. the workspace will be created, and we will be routed to a screen like this.
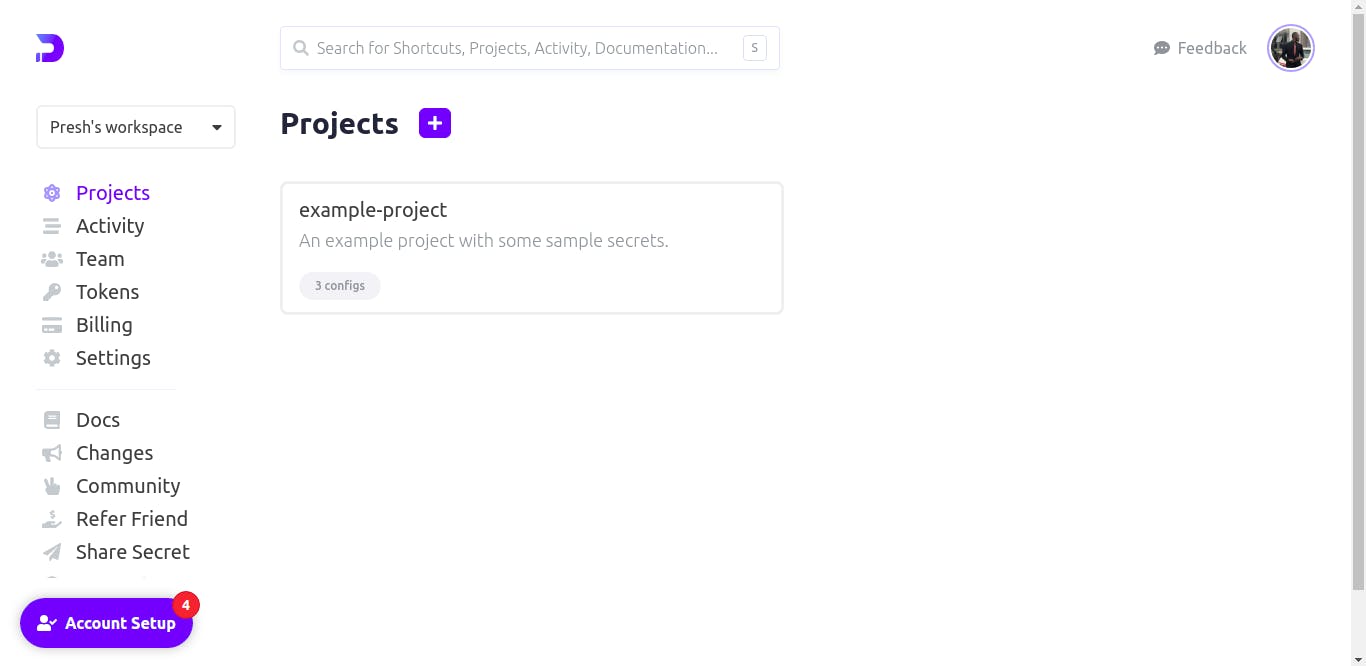
That is what your workspace should be like if you create a new workspace. If you notice, there’s a test project added there already, but we won’t be using that. Let’s add a new project for the e-commerce app by clicking on the plus icon there.
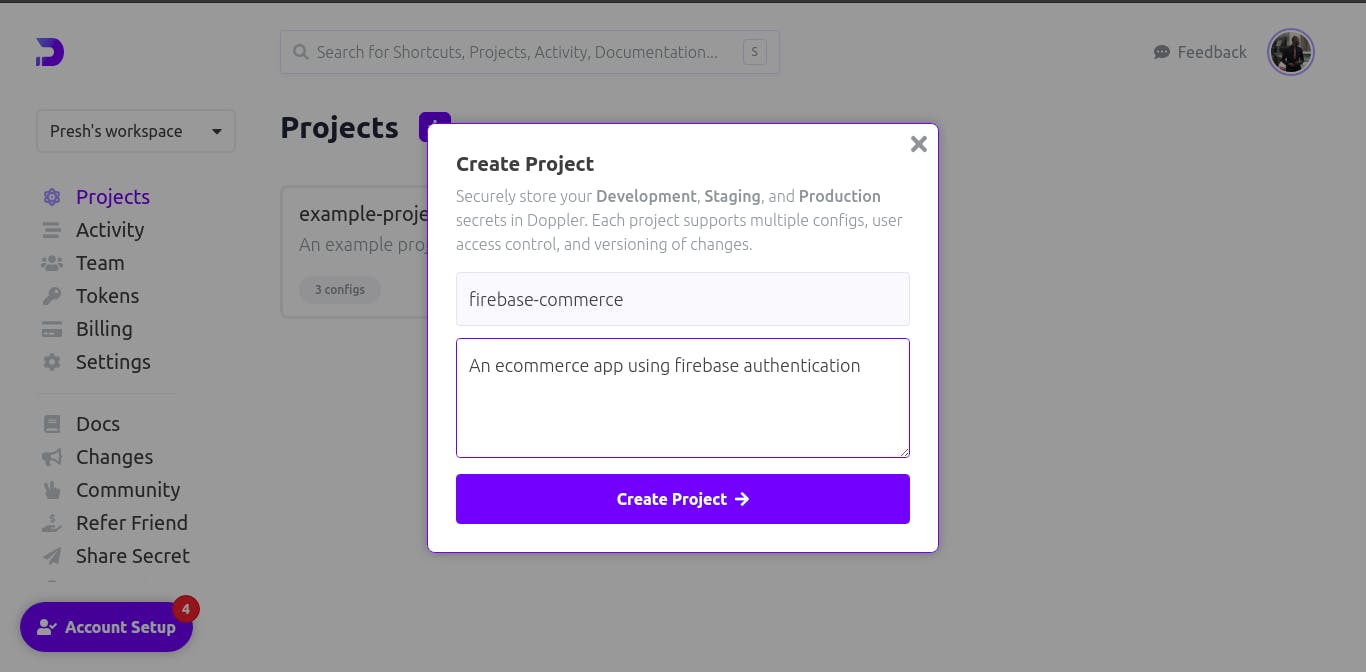
As seen above, I named my project firebase-commerce and added a description. Next, we need to add the environment variables needed in the project. Clicking on the project we just created will take us to a screen like the one below.
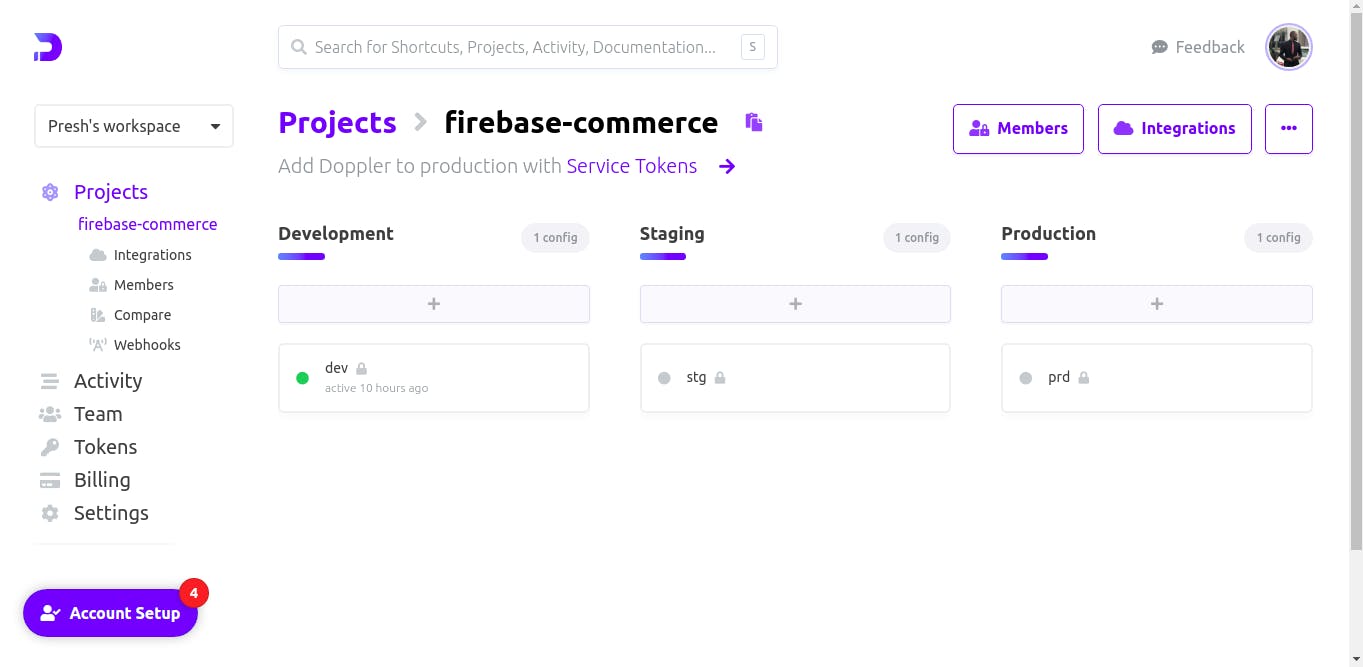
There you’ll see different environments prepopulated for us, development, staging, and production. We can add different variables needed in each environment. And if they all use the same variables, we can easily add them to one and sync them across all environments. Note that we can also add custom environments by clicking on the hamburger icon at the top right of the page.
Let’s add variables to the development environment, and also sync them to the two others. To do this, we need to click on the rectangle with dev in it. It will open a page like the one below.
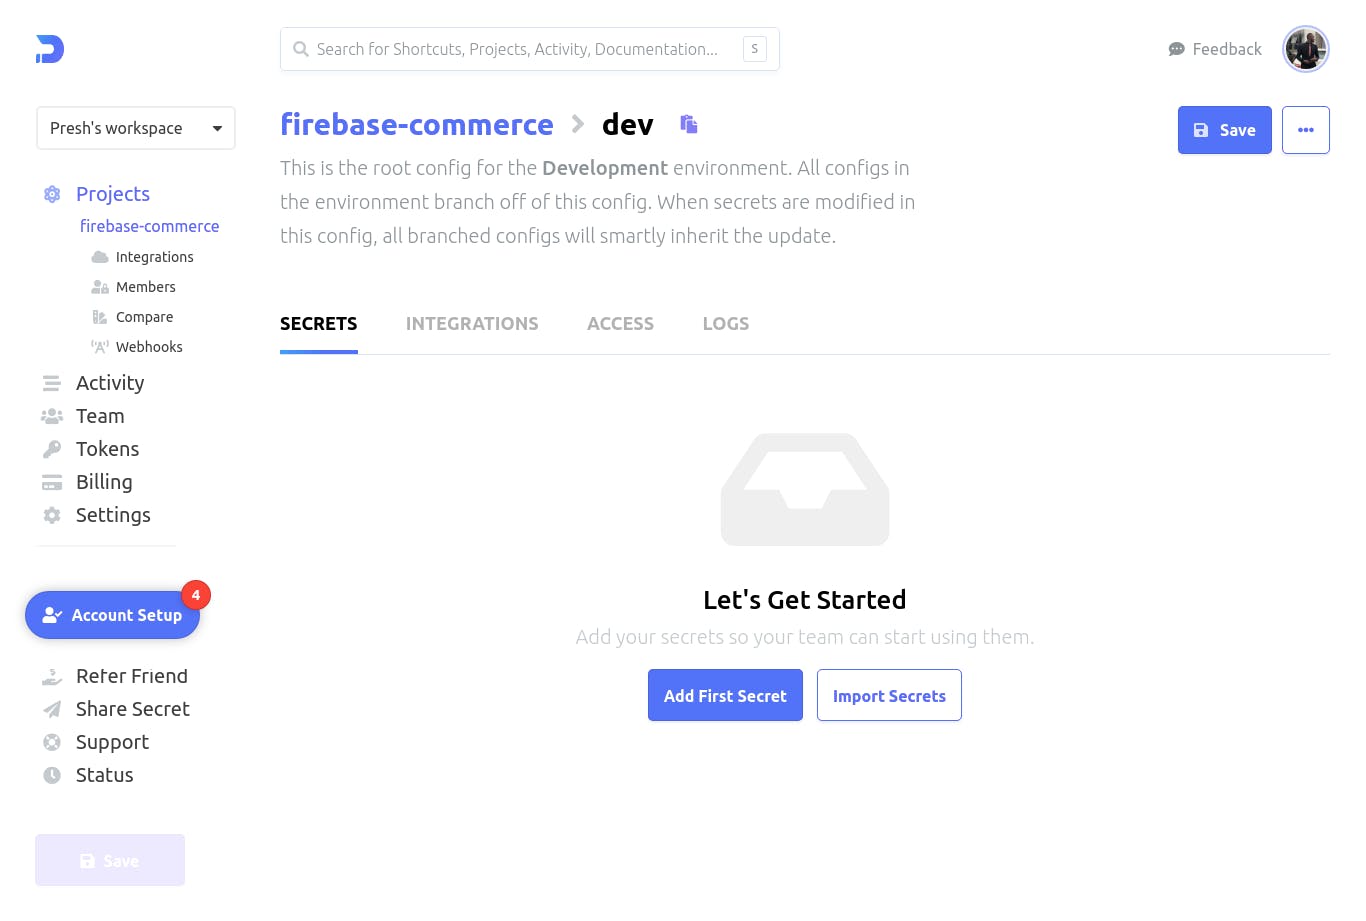
We can add variables singly by clicking on the 'Add first Secret' or by clicking on the other button and where we import all our variables from ENV, JSON, or YAML format. We will use the second option to make things faster. Click on the button. You should see a screen like the one below.
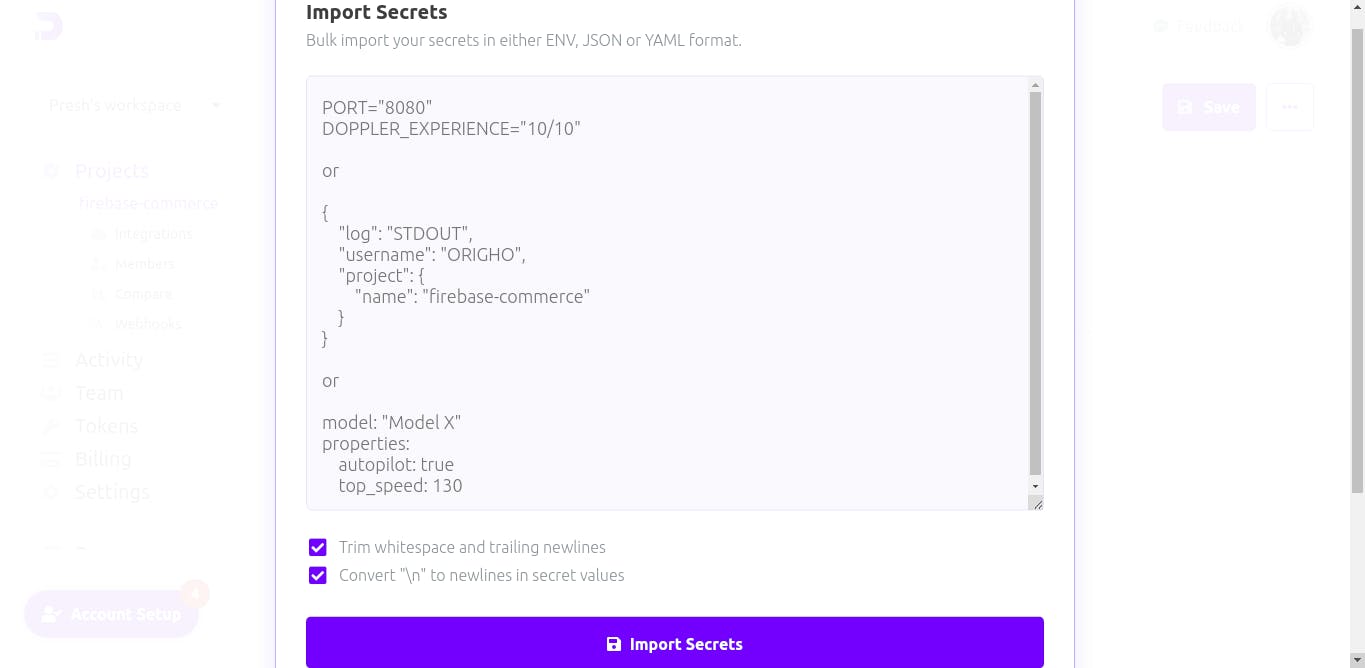
Copy and paste the below code into the textarea provided and click on ‘Import Secrets` below.
REACT_APP_APIKEY = AIzaSyBzklmuZsb_5Ait1FatkT-Mg3Vor1hFJ8A
REACT_APP_AUTH_DOMAIN = ecomerce-project-40990.firebaseapp.com
REACT_APP_DATABASE_URL = https://ecomerce-project-40990.firebaseio.com
REACT_APP_PROJECT_ID = ecomerce-project-40990
REACT_APP_STORAGE_BUCKET = ecomerce-project-40990.appspot.com
REACT_APP_SENDER_ID = 361284578530
REACT_APP_APP_ID = 1=361284578530:web:58896ab84048601b9682bb
Importing it will take us back to this screen with all the variables set up.
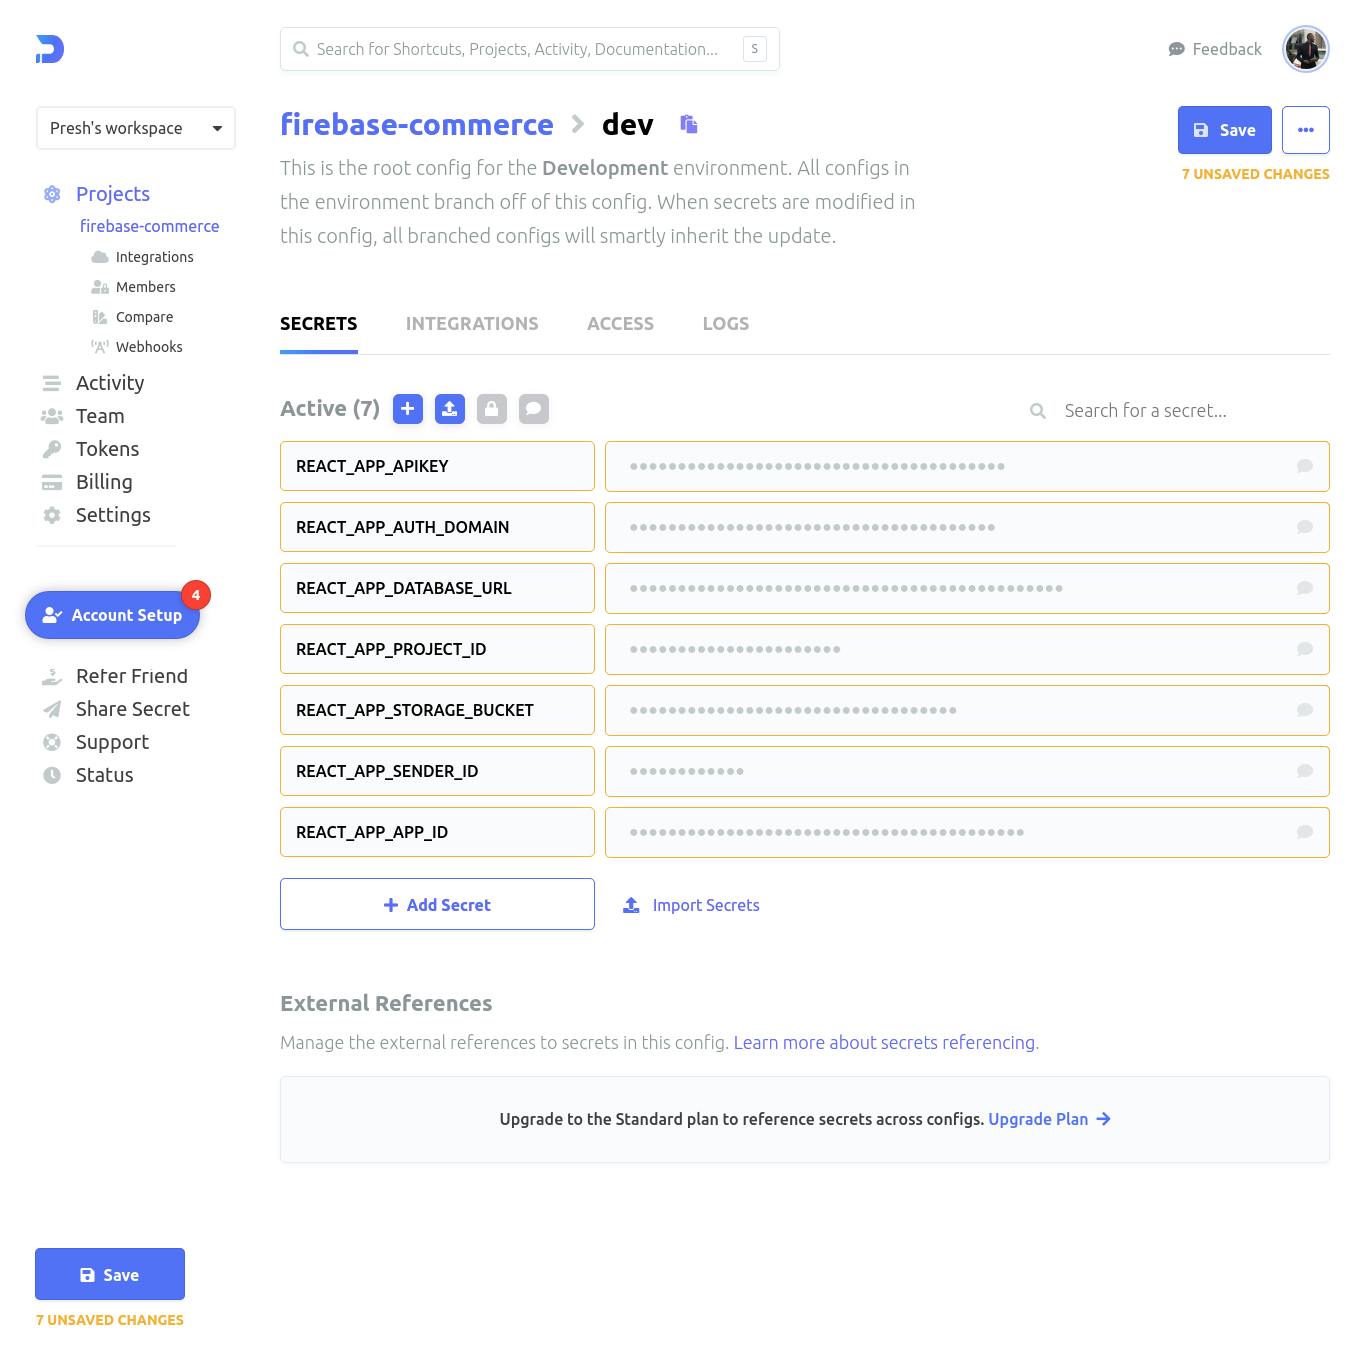
There’s a ‘Save’ button at the top right of the page, click on it to save the variables.
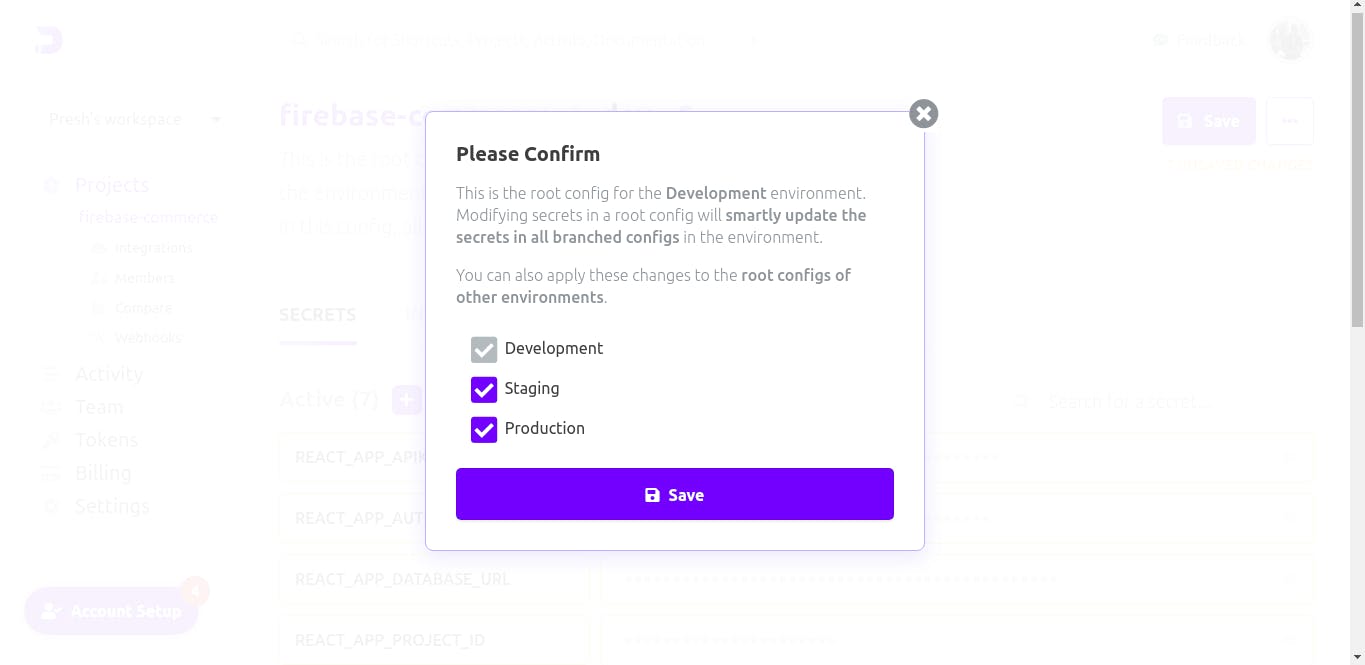
I’m selecting the two other environments do they will have the variables also.
We have now set up a doppler account, a workspace, and a project. We also variables to environments in the project. Next, let’s add a netlify integration to this project. to do this click on ‘Integrations’.
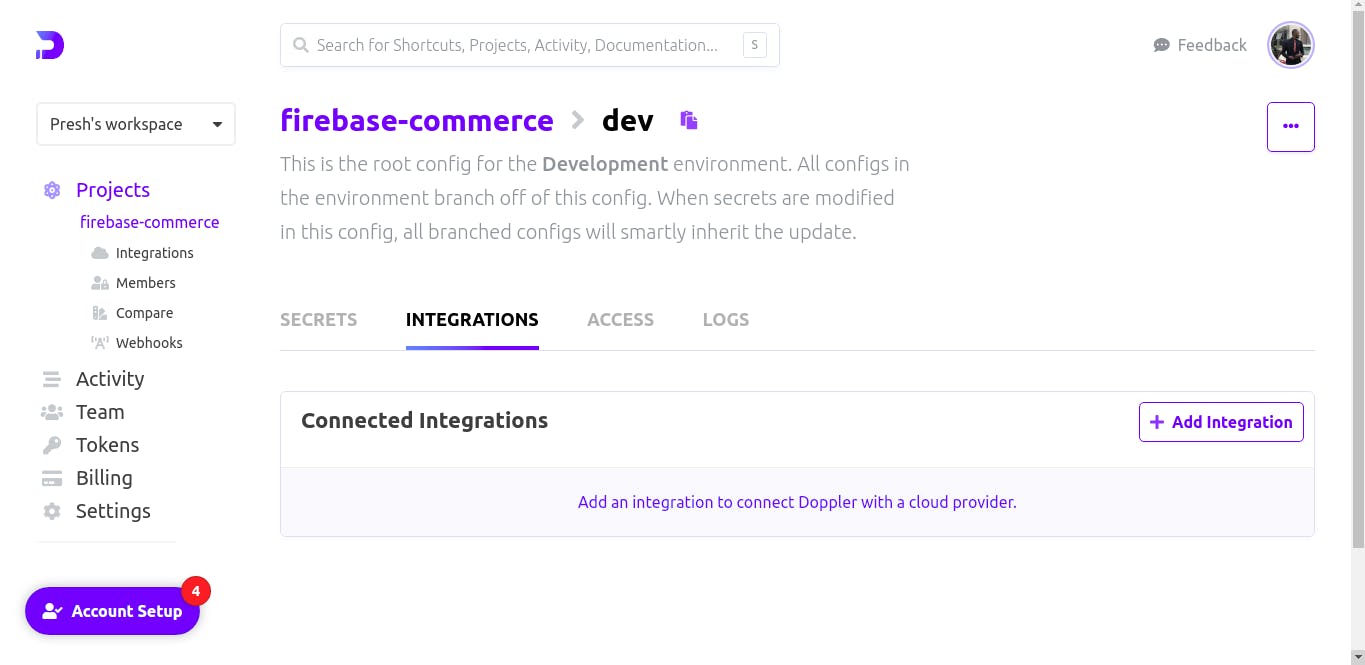
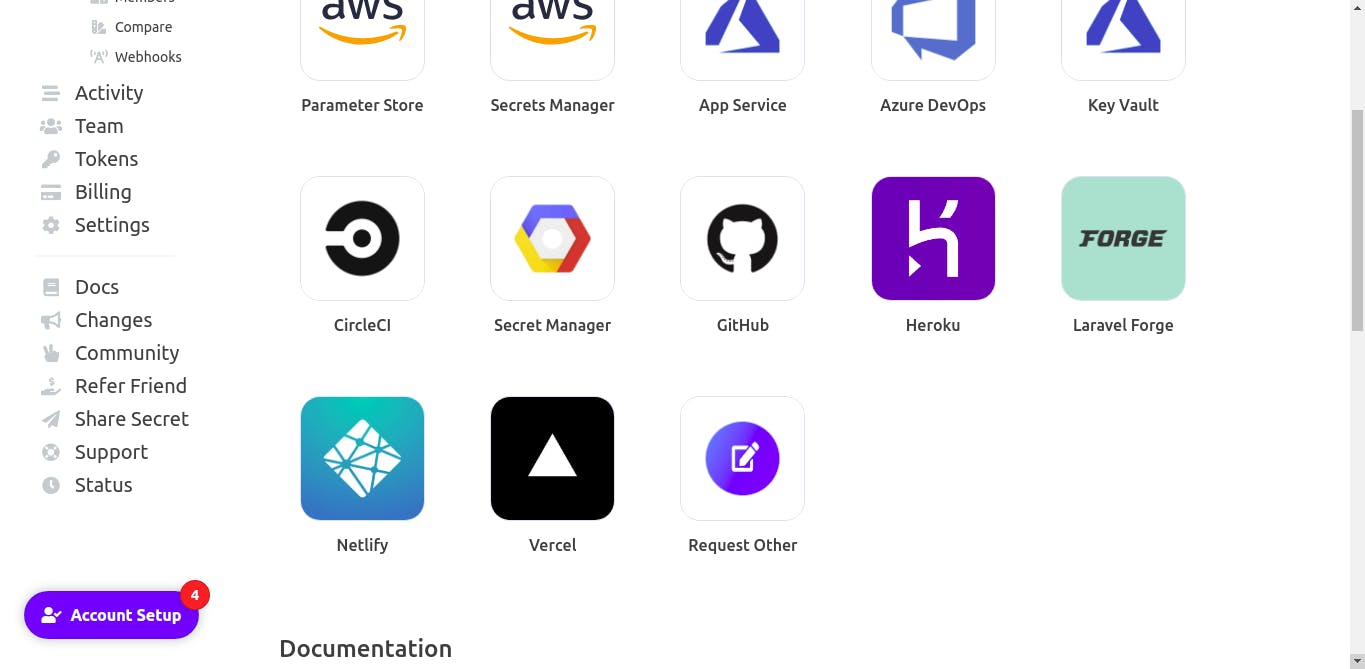
Now, let’s add a netlify integration by clicking on the ‘Add Integration’ button. then select netlify
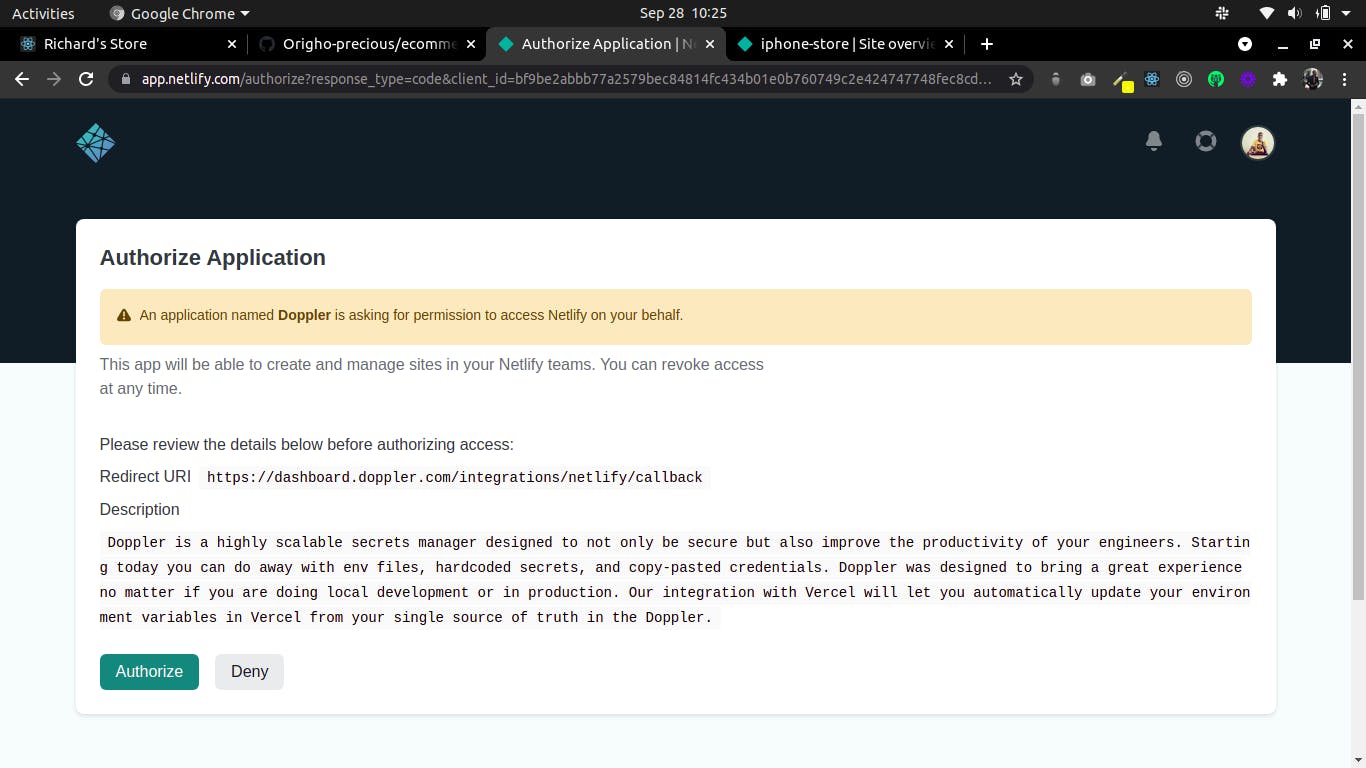
We will be routed to a page where we need to authorize netlify to use doppler
Next, we select the website needed from the list of sites we have deployed to netlify. At this point, If you are yet to deploy the e-commerce project to netlify, you need to do it now to continue.
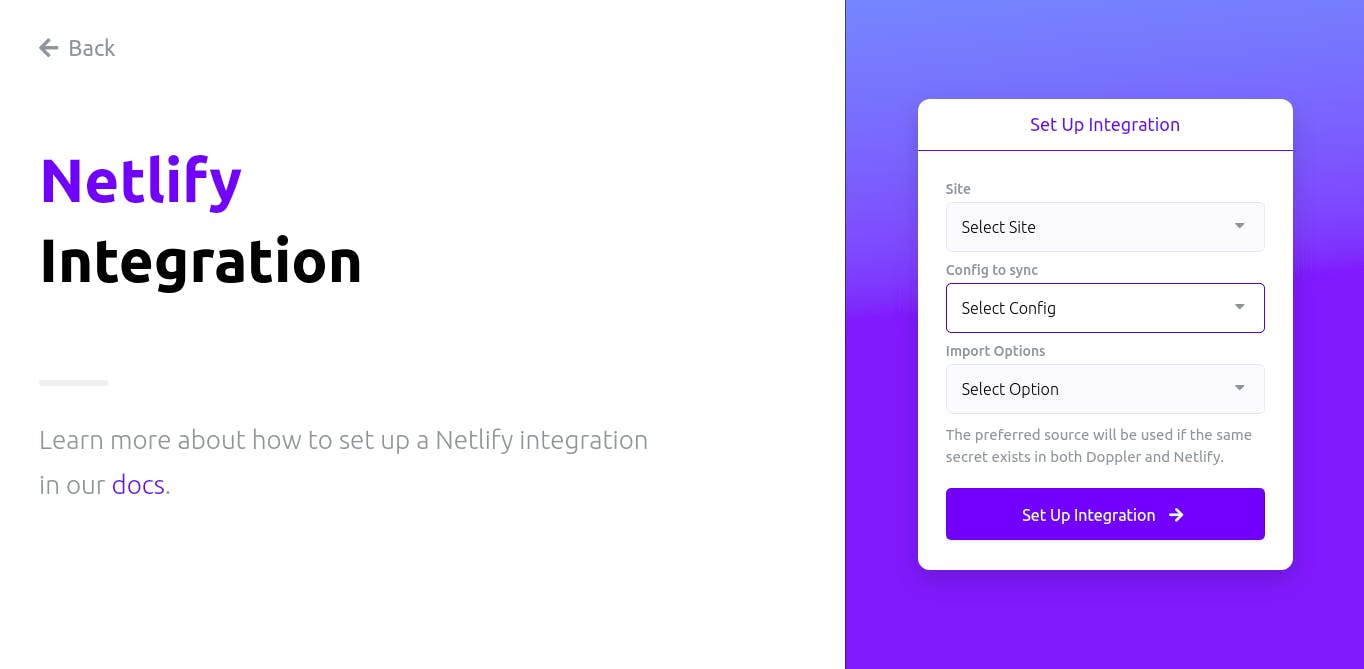
As seen above, we will also select the config we want to use from the environments we have in the project e.g development, staging, and production. I will go with development (dev). The last input is for selecting which variables should be used in cases where we have variables from doppler and netlify. I set my preference to doppler. When you’re done, click on the button below.
We have now integrated the project we deployed on netlify with our secrets from doppler.
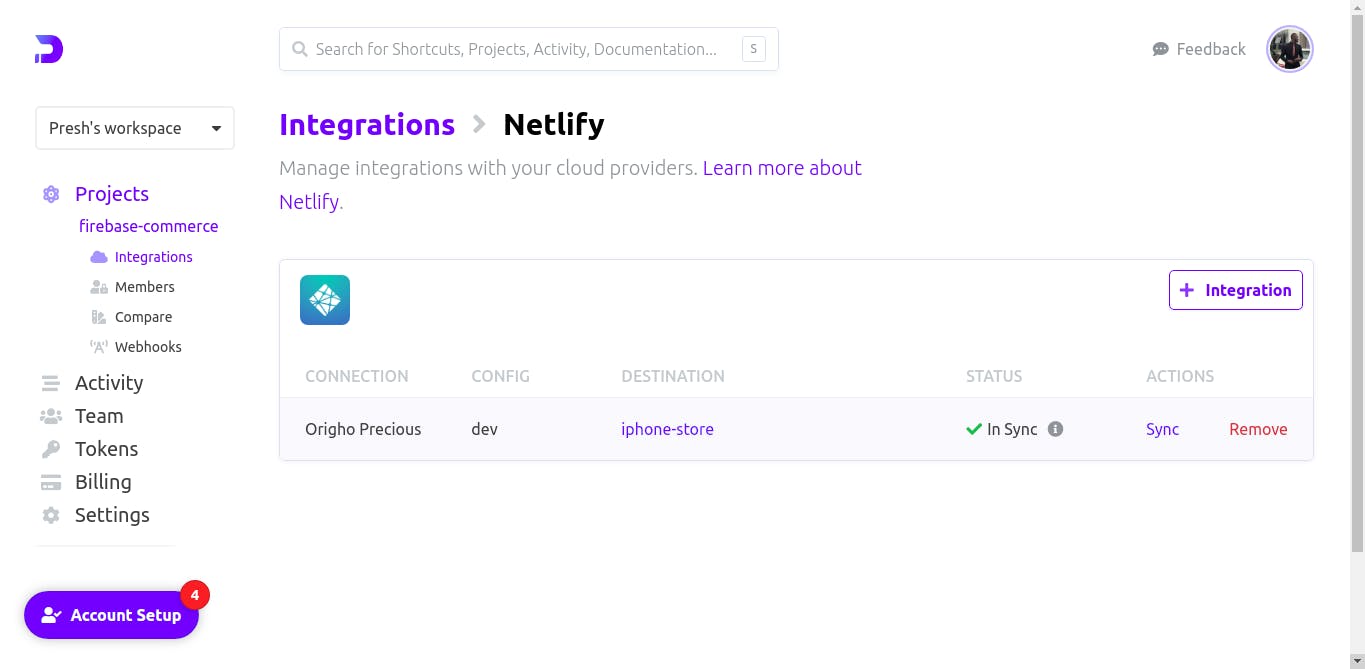
To verify that the variables on the doppler workspace are correctly integrated with the netlify app, go to the project on netlify and check the environment variables. You can see mine below.
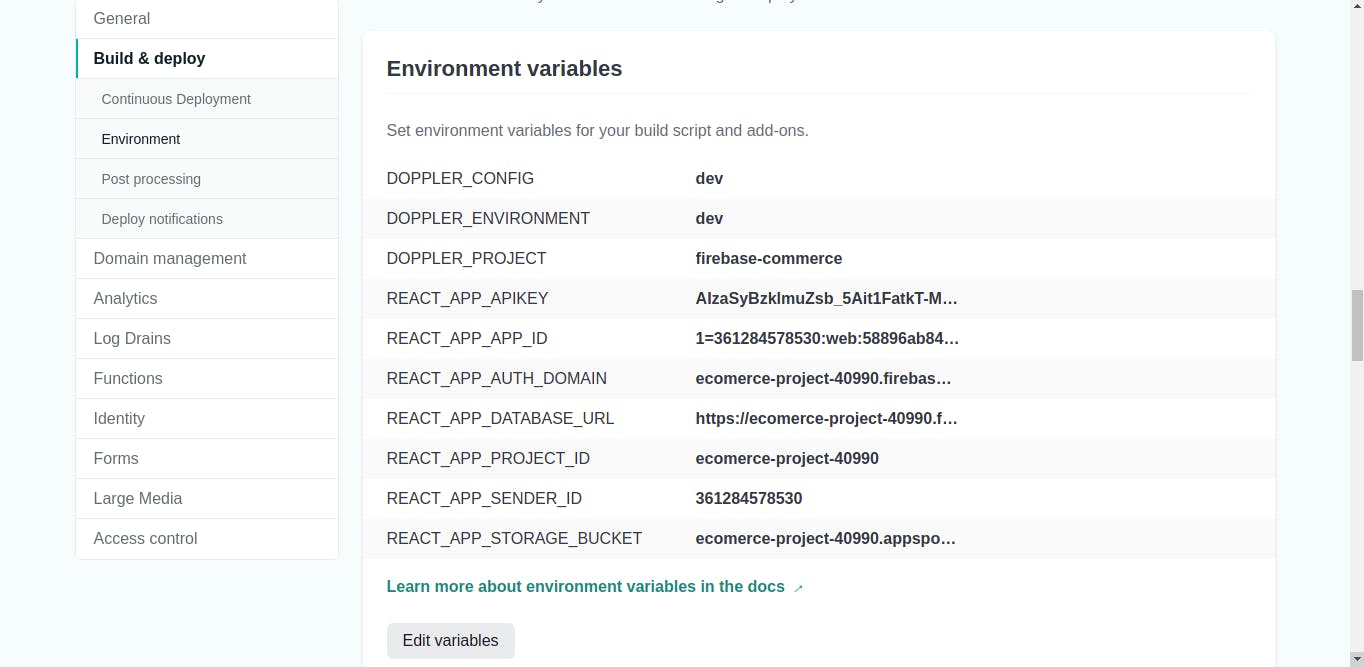
You can go ahead and test the app if you want using the netlify site link.
Conclusion
We have now learned how to save secrets in doppler and integrate them with Netlify. While learning to do this, we learned how to create a doppler workspace and how to add environment variables/secrets. We did this and were also able to confirm they were added correctly to the project on netlify. Now you see how easy and fast is it to manage netlify app secrets with doppler, you will see more of the advantages when you want to update any of the variables. We can do that in the doppler workspace and save it, any platform integrated with that workspace will be updated accordingly.
